This month we get our big end replaced and flywheel balanced
Words and photography by Matt
Years of knowledge, expertise and the ability to put up with my stupid questions courtesy of Trevor Hedge (Trevorhedgeracing.co.uk 01603 742466)
With all the hassles the worn cam followers, guides and rocker arms have caused in the last few weeks, it’s nice to get a major part of the engine finished; the big end.
Enjoy more Classic Bike Guide Magazine reading every month.
Click here to subscribe & save.
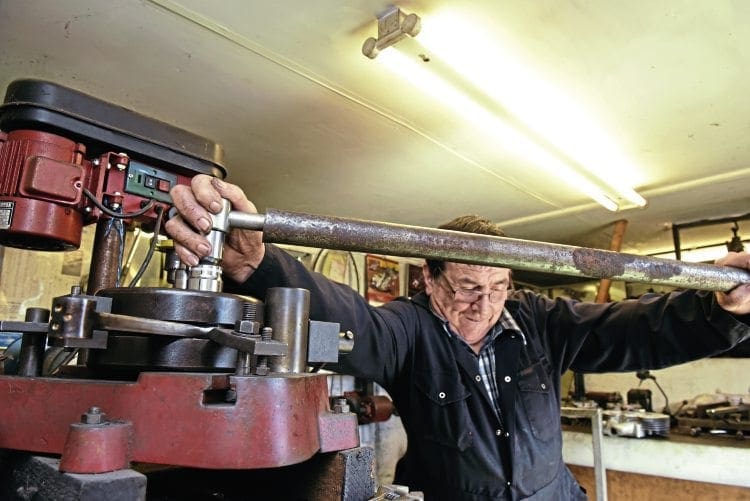
While there are few cranks that are as straightforward to pull apart than an ES2 – bolt together, no taper – it was still best to have this job done by a professional.
After all, it is the central part and if it goes wrong or isn’t balanced correctly, the bike will be horrible to ride and you’ll kiss goodbye to the engine very quickly.
The most qualified person I know for this task is Trevor Hedge, successful ex-speedway rider/ (he rode for Norwich, Wimbledon and the UK in world finals) turned engine builder.
Trevor is used to large singles and has a brilliant reputation, which probably comes from working with scarily fast, high-revving speedway motors for more years than he would like me to say…
First job was to take apart the crank, which the friends I had asked to check, said felt fine. If it was down to me, I’d have left it, and Trevor agreed it felt fine with smooth rotation and did I really want to replace the crank pin? You don’t learn unless you see these jobs and I’d bought a new pin, so yes, let’s do it.
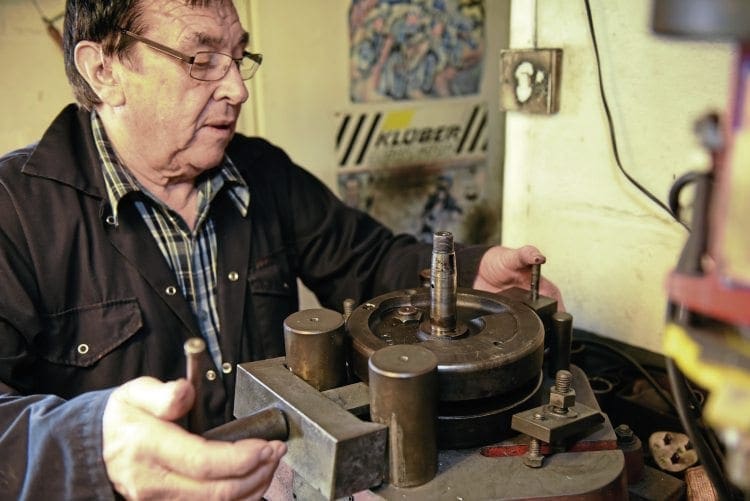
Trevor rebuilds a lot of cranks, and has a marvellous old Humphries Simons jig made for the job.
This heavyweight clamps the two webs securely and accurately, and would also be essential when bolting back together.
So we removed the safety screws that ensure the crank pin nuts don’t come loose, with large breaker bar and extension on the nut, both crank pin nuts were only lightly fitted – hinting that it had already been looked at. Again – never buy a box of bits like I did…
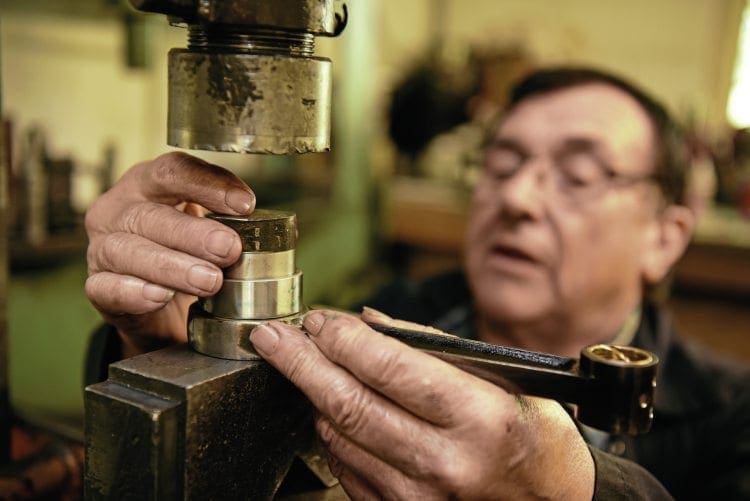
Still, one job that turned out easier than expected and the next job, was to press the old pin out.
They are a tight fit, but with the press and correct size drift, easily and smoothly came out, revealing the roller bearings, with fairly unused grease – it had been apart!
No matter, Trevor then checked all parts for any sign of trouble and gave everything, especially any oilways, a good washing in the parts washer before starting the rebuild.
Read more and view more images in the July 2019 issue of CBG – on sale now!