A main stand gives up the ghost, leaving Hutch no choice but to get the heavy tools out.
Enjoy more Classic Bike Guide Magazine reading every month.
Click here to subscribe & save.
By Hutch and Chelley
After moving on a couple of bikes I wasn’t really attached to or riding (always a waste of valuable parking space, in my opinion), I ended up with a Triumph T150 as part of one of those deals. While there has been a Triumph twin or two in my garage seemingly forever, I’ve never owned or pined for a triple.
After doing a few bits of tidying up, rebuilding the front end, and general fettling, the T150 now starts and runs pretty well and I’ve been surprised by both its turn of speed and smoothness.
I took a run out on the triple one Thursday over to Editor Matt’s for him to have a ride on the bike one sunny afternoon – any excuse for a ride – and was pleasantly surprised from both his comments on the bike and the fact that it came back in one, running piece (that is fair, as I may have broken Hutch’s Norton Atlas once after just three miles – Matt). The next evening, having enjoyed the previous ride so much, I took the T150 out again to a local bike meet.

Getting more used to it, I am still impressed by how well it goes and I can report that the Mrs was struggling to keep up on her Harley-Davidson 1200 Sportster down the local lanes. Fortunately, she managed to catch up and flag me down on the way home, as the Triumph main stand was hanging down, but just on the nearside. I managed to hook it up with my foot and the last 15 miles were possibly slightly less spirited.
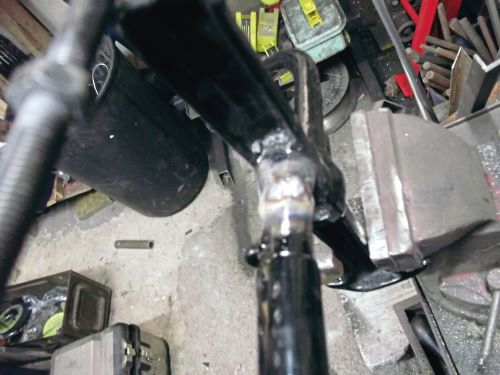
I had assumed one of the stepped main stand bolts had fallen out, certainly not unknown on other Triumphs, but a closer inspection revealed that the stand had been repaired before and appeared to have failed again in the heat affected zone (HAZ) of part of the weld repair. One trawl around the internet quickly led me to the conclusion that further repair was the better – and certainly the most economic – solution.


Once on the bench and having removed the two halves of the broken stand, I crawled back under the bike on its sidestand and made a dimensioned sketch of the mounting points for the main stand on the frame.
Taking the two broken halves of the stand, I retired to where I do all the mucky jobs in an effort to keep the dust and swarf away from engine and bike rebuilds. Taking an angle grinder with a sanding disc fitted, followed by an ‘electric file’ or handheld linisher, I cleaned back the fracture face on both halves of the broken stand. One thing I have learnt from friends who are time-served welders and far more skilled than I am is that they take far more time cleaning and prepping parts compared to the time actually welding. By the end I was happy that all was clean.
I measured the internal diameter (ID) of the part to be repaired at 14.7/14.8mm, then looking through my box of scrap (everyone needs a box of scrap!), I found some round steel bar with an OD (outer diameter) slightly over the size of the stand. I popped this length into the lathe to turn down to the required OD and cut to a useable length as an insert in the broken stand. This should give the broken area a lot more strength.
The turned insert was ‘fitted’ (it was a tight fit) and using some studding, nuts, and four washers as a jig, the mounting lug dimension previously measured and noted was set, the washers hopefully keeping things square. Once I was happy that the dimensions were set correctly, I picked up my MIG (actually MIG stands for Metal Inert Gas but I’m using CO2, which is an active gas, so should be MAG – sorry) welder and tacked the repair in place. Once I was happy, I could then fully weld it.
There was a choice for this job, and brazing may have been as good if not better solution – however, particularly due to the previous repairs, I thought the much more localised heat from an electric weld would be preferable. They are putting up with a lot of weight!


After putting in a little thought as to the best way to hold and weld the stand – you have to get the gun all the way around the tube, I put a lap weld between each side of the broken part of the stand, the machined insert and then a cap weld over and between the two. The part was then left to cool, slowly; quenching is never a fantastic idea unless you are trying to lock in stress to come out later.
Once cool, the repair was dressed a little with the electric file and given a lick of chassis black paint.
There was the usual fight to refit the stand and spring; my preferred method is to fit the spring first. Still a two-person job, but slightly easier.
The stand feels fine and more solid than before. The job wasn’t as difficult as some but needed to be right, as incorrect measurements could have the bike on the wonk, too hard to get on the stand, or too easy – both just as bad! Once more, the triple was back on two legs, making my life easier.